m (Fixed typo and added reflist) |
No edit summary |
||
| (5 intermediate revisions by 3 users not shown) | |||
| Line 1: | Line 1: | ||
| − | {{Stub}} |
+ | {{Construction}}{{Stub}} |
| + | '''Bomb''' is a gamemode featured in several installments of the ''[[Tom Clancy's Rainbow Six Franchise]]''. |
||
| − | [[File:R6 Bomb.jpg|thumb|309x309px]] |
||
| + | <tabber> |
||
| + | |-|RS/Rogue Spear = |
||
| + | ==Rainbow Six and Rogue Spear== |
||
| + | {{Infobox/Gamemode |
||
| + | |title = Save Your Base |
||
| + | |image = |
||
| + | |caption = |
||
| + | |modetype = PVP |
||
| + | |teams = [[Rainbow]] vs Rainbow}} |
||
| + | '''Save Your Base''' is a gamemode featured in ''[[Tom Clancy's Rainbow Six]]'' that was introduced in the [[Eagle Watch]] expansion. It returns unchanged in ''[[Tom Clancy's Rainbow Six: Rogue Spear]]''. Teams fight to locate the detonator that the enemy team has wired to their base. Once located, teams must disarm the detonator at their base before the other team. Detonators are the same color as the team needs to disarm them. |
||
| + | |||
| + | {{Gamemodes/Rainbow Six}} |
||
| + | {{Gamemodes/Rogue Spear}} |
||
| + | |||
| + | |-|Siege = |
||
| + | ==Siege== |
||
| + | {{Infobox/Gamemode |
||
| + | |title = Bomb |
||
| + | |image = R6 Bomb.jpg |
||
| + | |caption = |
||
| + | |modetype = PVE<br/>PVP |
||
| + | |teams = [[Rainbow]] vs [[White Masks]]<br/>Rainbow vs Rainbow}} |
||
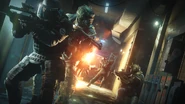
'''Bomb''' is a PVP gamemode featured in ''[[Tom Clancy's Rainbow Six Siege]]''. |
'''Bomb''' is a PVP gamemode featured in ''[[Tom Clancy's Rainbow Six Siege]]''. |
||
| − | ==Overview== |
+ | ===Overview=== |
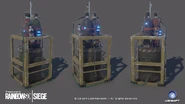
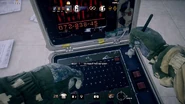
Two bombs have been placed in the objective location. The Attackers must attempt to defuse one of the bombs by activating the defuser. Once activated, the defuser will take 45 seconds (60 seconds in [[Terrorist Hunt (Siege)|Terrorist Hunt]]) to disarm the bomb. The attackers win the round if they can defuse one of the two bombs, or if the enemy team is eliminated. The Defenders must prevent the Attackers from activating the defuser or disable the defuser that already has been activated. The Defenders can win by destroying the defuser after it has been planted, or alternatively, eliminating the Attackers before they're able to plant the defuser. |
Two bombs have been placed in the objective location. The Attackers must attempt to defuse one of the bombs by activating the defuser. Once activated, the defuser will take 45 seconds (60 seconds in [[Terrorist Hunt (Siege)|Terrorist Hunt]]) to disarm the bomb. The attackers win the round if they can defuse one of the two bombs, or if the enemy team is eliminated. The Defenders must prevent the Attackers from activating the defuser or disable the defuser that already has been activated. The Defenders can win by destroying the defuser after it has been planted, or alternatively, eliminating the Attackers before they're able to plant the defuser. |
||
| − | In [[Ranked]] planting the defuser takes |
+ | In [[Ranked]] planting the defuser takes seven seconds, after which the 45 second fuse time starts, indicated by a circle where the round timer was. Disabling the defuser takes seven seconds, effectively giving the Defenders 38 seconds after planting to secure the site.<ref>https://www.reddit.com/r/Rainbow6/comments/70bb3i/ranked_custom_match_rules/dn1v1u3/</ref> |
If the defuser is planted on an un-reinforced hatch, destroying the hatch can cause the defuser to fall out of the room, resulting in an instant loss for the Attackers. |
If the defuser is planted on an un-reinforced hatch, destroying the hatch can cause the defuser to fall out of the room, resulting in an instant loss for the Attackers. |
||
| − | ==Objective Locations== |
+ | ===Objective Locations=== |
| − | ===Bank=== |
+ | ====Bank==== |
<gallery type="slideshow" widths="600" position="center"> |
<gallery type="slideshow" widths="600" position="center"> |
||
Bank_basement_secure_area.png |
Bank_basement_secure_area.png |
||
| Line 18: | Line 40: | ||
Bank_2nd_floor_secure_area.png |
Bank_2nd_floor_secure_area.png |
||
</gallery> |
</gallery> |
||
| − | ---- |
||
| − | ===Chalet=== |
+ | ====Chalet==== |
<gallery type="slideshow" widths="600" position="center"> |
<gallery type="slideshow" widths="600" position="center"> |
||
Chalet_basement_secure_area.png |
Chalet_basement_secure_area.png |
||
| Line 26: | Line 47: | ||
Chalet_second_floor.png |
Chalet_second_floor.png |
||
</gallery> |
</gallery> |
||
| − | ---- |
||
| − | ===Club House=== |
+ | ====Club House==== |
<gallery type="slideshow" widths="600" position="center"> |
<gallery type="slideshow" widths="600" position="center"> |
||
Club_house_basement_secure_area.png |
Club_house_basement_secure_area.png |
||
| Line 34: | Line 54: | ||
Club_house_2nd_floor_secure_area.png |
Club_house_2nd_floor_secure_area.png |
||
</gallery> |
</gallery> |
||
| − | ---- |
||
| − | ===Consulate=== |
+ | ====Consulate==== |
<gallery type="slideshow" widths="600" position="center"> |
<gallery type="slideshow" widths="600" position="center"> |
||
Consulate_basement_secure_area.png |
Consulate_basement_secure_area.png |
||
| Line 42: | Line 61: | ||
Consulate_2nd_floor_secure_area.png |
Consulate_2nd_floor_secure_area.png |
||
</gallery> |
</gallery> |
||
| − | ---- |
||
| − | ===Hereford Base=== |
+ | ====Hereford Base==== |
<gallery type="slideshow" widths="600" position="center"> |
<gallery type="slideshow" widths="600" position="center"> |
||
hereford base basement secure area.png |
hereford base basement secure area.png |
||
| Line 51: | Line 69: | ||
hereford base 3rd floor secure area.png |
hereford base 3rd floor secure area.png |
||
</gallery> |
</gallery> |
||
| − | ---- |
||
| − | ===House=== |
+ | ====House==== |
<gallery type="slideshow" widths="600" position="center"> |
<gallery type="slideshow" widths="600" position="center"> |
||
House_basement_secure_area.png |
House_basement_secure_area.png |
||
| Line 59: | Line 76: | ||
House_2nd_floor_secure_area.png |
House_2nd_floor_secure_area.png |
||
</gallery> |
</gallery> |
||
| − | ---- |
||
| − | ===Kafe Dostoyevsky=== |
+ | ====Kafe Dostoyevsky==== |
<gallery type="slideshow" widths="600" position="center"> |
<gallery type="slideshow" widths="600" position="center"> |
||
Kafe_basement_secure_area.png |
Kafe_basement_secure_area.png |
||
| Line 67: | Line 83: | ||
Kafe_2nd_floor_secure_area.png |
Kafe_2nd_floor_secure_area.png |
||
</gallery> |
</gallery> |
||
| − | ---- |
||
| − | ===Kanal=== |
+ | ====Kanal==== |
<gallery type="slideshow" widths="600" position="center"> |
<gallery type="slideshow" widths="600" position="center"> |
||
Kanal_basement_secure_area.png |
Kanal_basement_secure_area.png |
||
| Line 75: | Line 90: | ||
Kanal_2nd_floor_secure_area.png |
Kanal_2nd_floor_secure_area.png |
||
</gallery> |
</gallery> |
||
| − | ---- |
||
| − | ===Oregon=== |
+ | ====Oregon==== |
<gallery type="slideshow" widths="600" position="center"> |
<gallery type="slideshow" widths="600" position="center"> |
||
Oregon_basement_secure_area.png |
Oregon_basement_secure_area.png |
||
| Line 83: | Line 97: | ||
Oregon_2nd_floor_secure_area.png |
Oregon_2nd_floor_secure_area.png |
||
</gallery> |
</gallery> |
||
| − | ---- |
||
| − | ===Presidential Plane=== |
+ | ====Presidential Plane==== |
<gallery type="slideshow" widths="600" position="center"> |
<gallery type="slideshow" widths="600" position="center"> |
||
Presidential_plane_basement_secure_floor.png |
Presidential_plane_basement_secure_floor.png |
||
| Line 91: | Line 104: | ||
Presidential_plane_2nd_floor_secure_area.png |
Presidential_plane_2nd_floor_secure_area.png |
||
</gallery> |
</gallery> |
||
| − | ---- |
||
| − | ==Gallery== |
+ | ===Gallery=== |
<gallery> |
<gallery> |
||
Rainbow Six Siege Bomb.png |
Rainbow Six Siege Bomb.png |
||
| Line 100: | Line 112: | ||
</gallery> |
</gallery> |
||
| + | {{Siege Gamemodes}} |
||
| + | </tabber> |
||
==References== |
==References== |
||
{{Reflist}} |
{{Reflist}} |
||
| − | + | [[Category:Gamemodes]] |
|
| + | [[Category:Gamemodes of Tom Clancy's Rainbow Six]] |
||
| + | [[Category:Gamemodes of Tom Clancy's Rainbow Six: Rogue Spear]] |
||
[[Category:Gamemodes of Tom Clancy's Rainbow Six Siege]] |
[[Category:Gamemodes of Tom Clancy's Rainbow Six Siege]] |
||
Revision as of 02:40, 3 January 2020

|
"A lot of eyes are on us this time, especially since we have poor intel." This article, Bomb (Disambig), is a stub and may require expansion. Please help out by editing the page. |
Bomb is a gamemode featured in several installments of the Tom Clancy's Rainbow Six Franchise.
Rainbow Six and Rogue Spear
Save Your Base is a gamemode featured in Tom Clancy's Rainbow Six that was introduced in the Eagle Watch expansion. It returns unchanged in Tom Clancy's Rainbow Six: Rogue Spear. Teams fight to locate the detonator that the enemy team has wired to their base. Once located, teams must disarm the detonator at their base before the other team. Detonators are the same color as the team needs to disarm them.
| ||||||||
| ||||||||
Siege
Bomb is a PVP gamemode featured in Tom Clancy's Rainbow Six Siege.
Overview
Two bombs have been placed in the objective location. The Attackers must attempt to defuse one of the bombs by activating the defuser. Once activated, the defuser will take 45 seconds (60 seconds in Terrorist Hunt) to disarm the bomb. The attackers win the round if they can defuse one of the two bombs, or if the enemy team is eliminated. The Defenders must prevent the Attackers from activating the defuser or disable the defuser that already has been activated. The Defenders can win by destroying the defuser after it has been planted, or alternatively, eliminating the Attackers before they're able to plant the defuser.
In Ranked planting the defuser takes seven seconds, after which the 45 second fuse time starts, indicated by a circle where the round timer was. Disabling the defuser takes seven seconds, effectively giving the Defenders 38 seconds after planting to secure the site.[1]
If the defuser is planted on an un-reinforced hatch, destroying the hatch can cause the defuser to fall out of the room, resulting in an instant loss for the Attackers.
Objective Locations
Bank
Chalet
Club House
Consulate
Hereford Base
House
Kafe Dostoyevsky
Kanal
Oregon
Presidential Plane
Gallery
| |||||||||||||||||


